


Being the owner of an institutional account, you can use our VPN, having access to certain resources that are only available in Escola Superior de Tecnologia da Saúde de Coimbra’s(ESTeSC).
Configuration Files
Tutorial – Windows Install
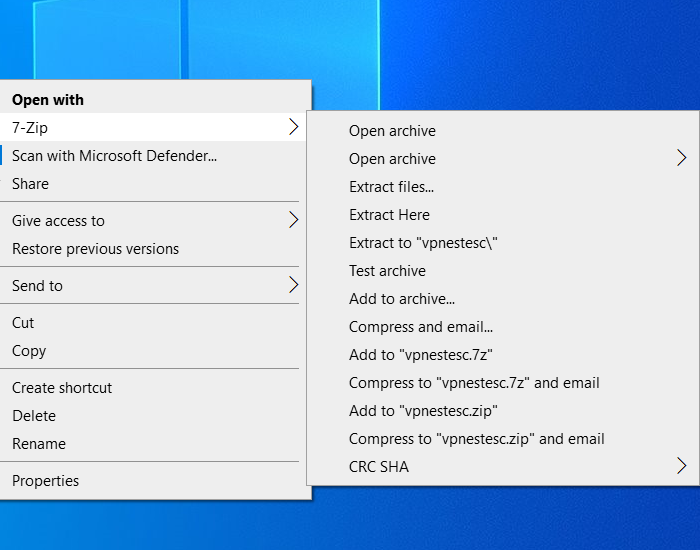
First, you will need to extract the files from the file “vpnestec.rar” by left clicking it and extracting it to a desired folder.
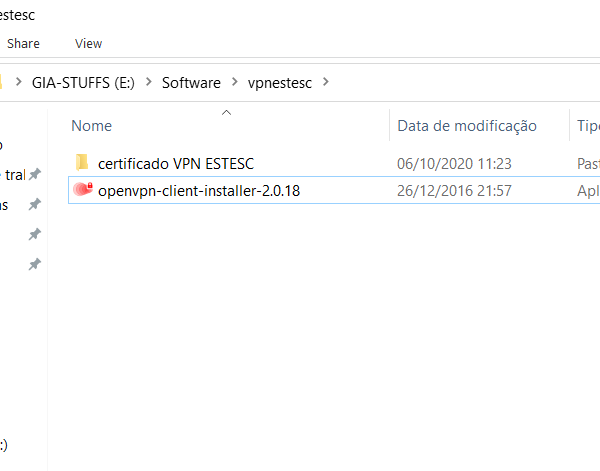
Open the folder named “vpnestec” and copy the folder “Certificado VPN ESTESC” to “My Documents” on your computer.
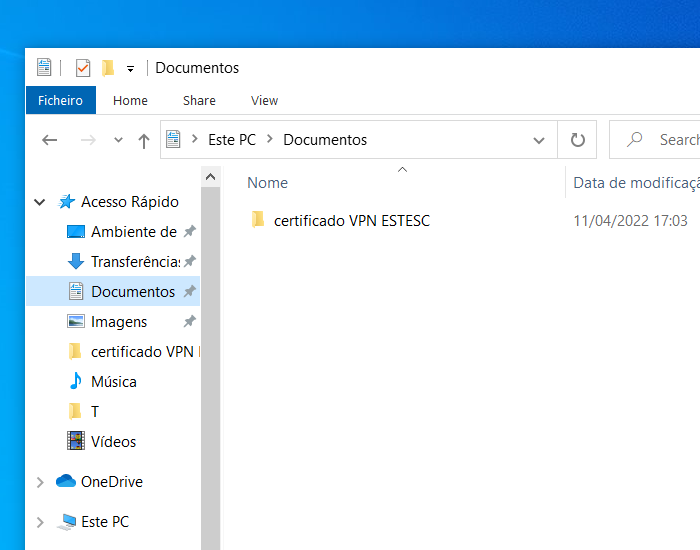
It will look like this.
Go back to the folder where the executable is and double click on the same.
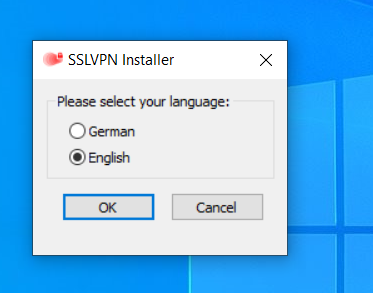
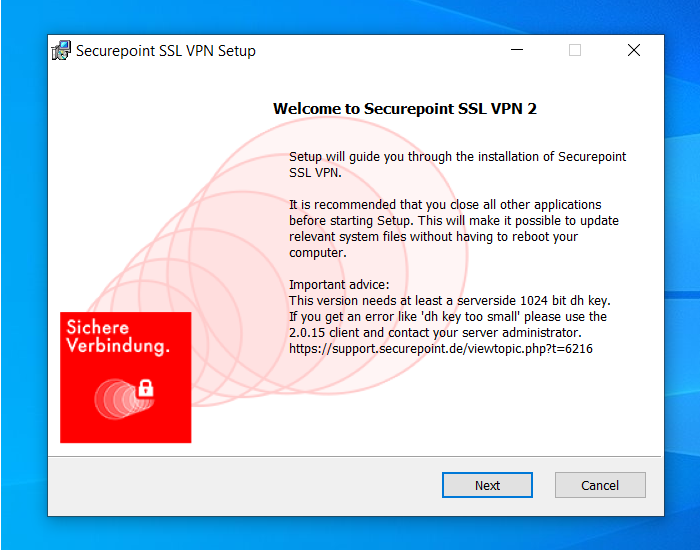
This window will appear. Now, choose the “English” option, clicking afterwards on “OK”.
Click “Next”.
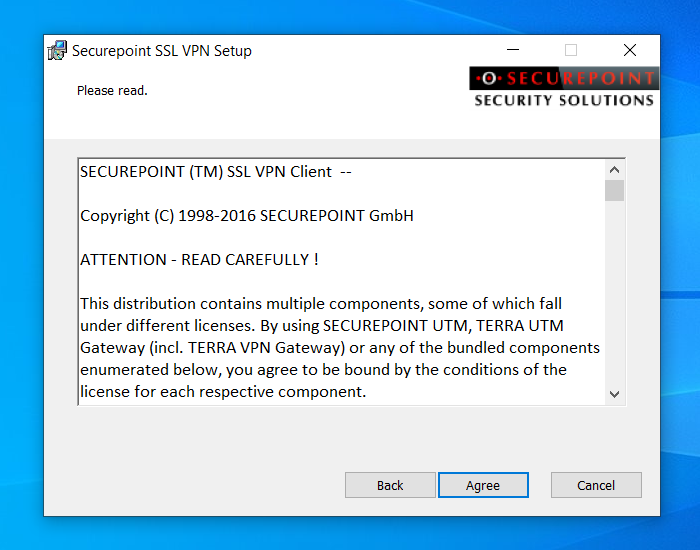
Click “Agree”.
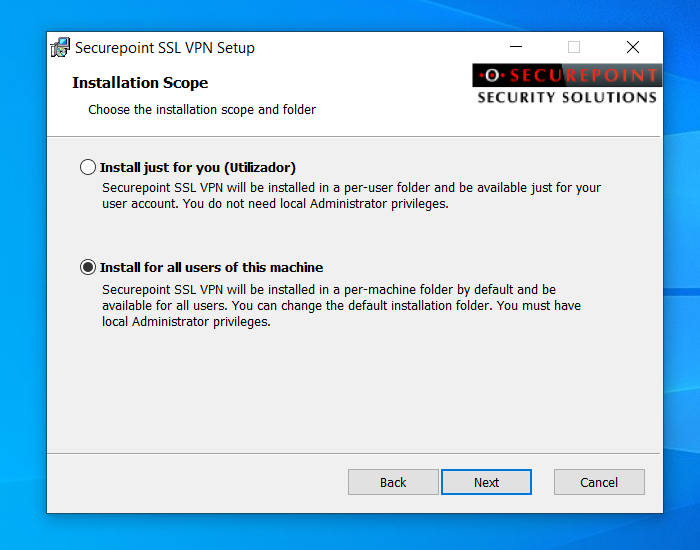
Choose the second option “Install for all users of this machine”, then click “Next”.
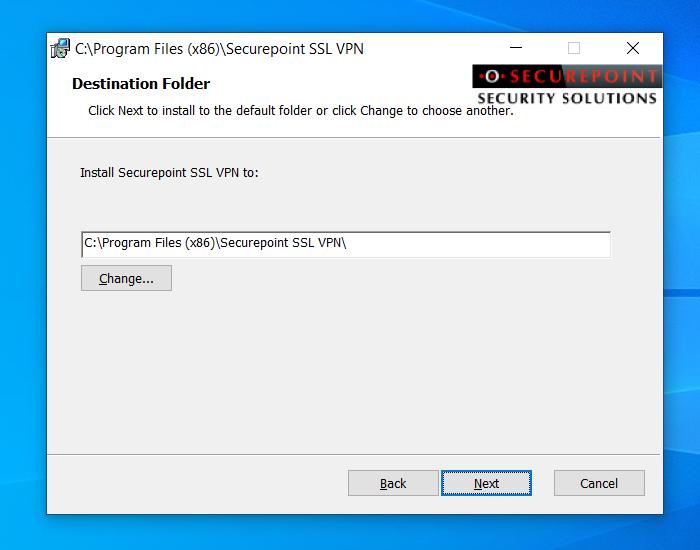
Now, confirm the directory where you want to install our VPN files and click “Next”.
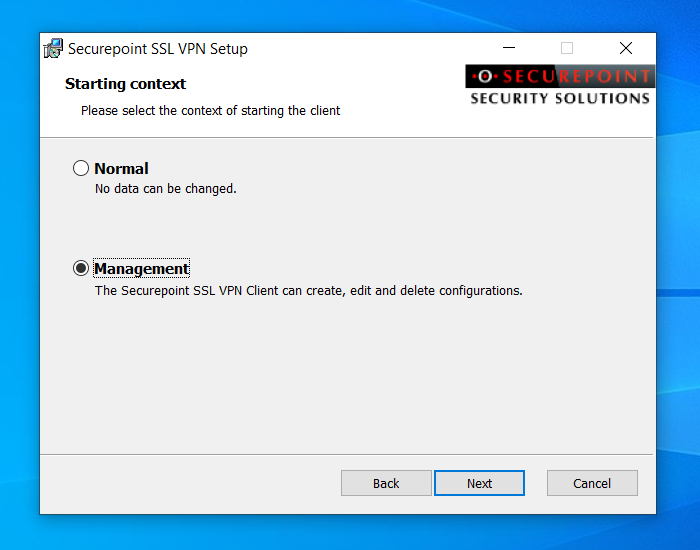
Click the option “Management” and click “Next”.
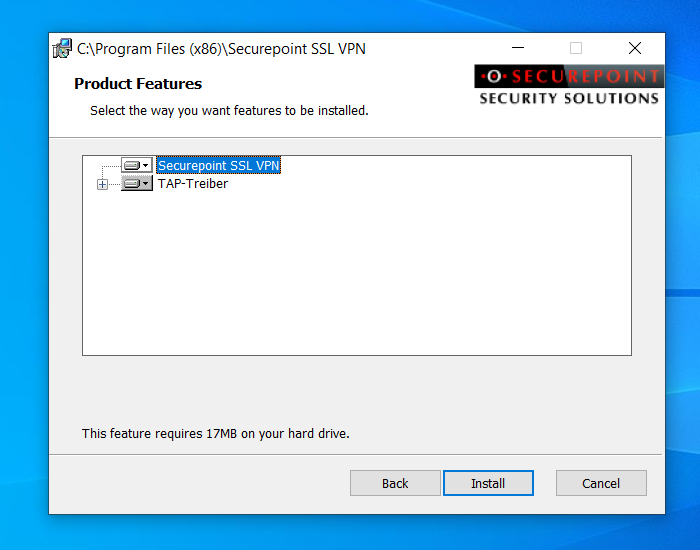
Click the “Install” button and wait for installation to complete.
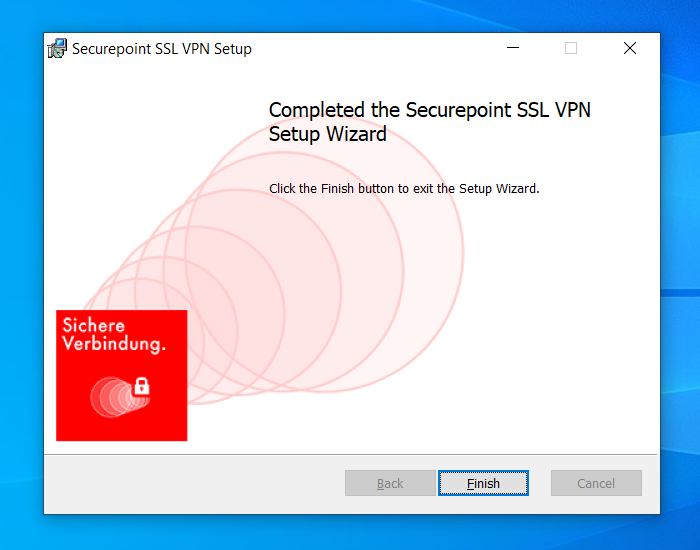
After the installation finishes, press the “Finish” button. You will now see an shortcut named “Securepoint SSL VPN” at your desktop.
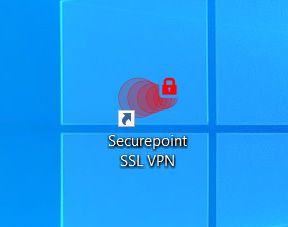
Run the VPN software by clicking the icon that appears in your workplace.
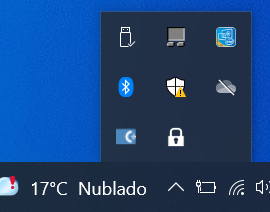
After entering the software, there will be a lock icon in the bottom left corner of the screen or inside the “^” button. Double click on the lock icon.
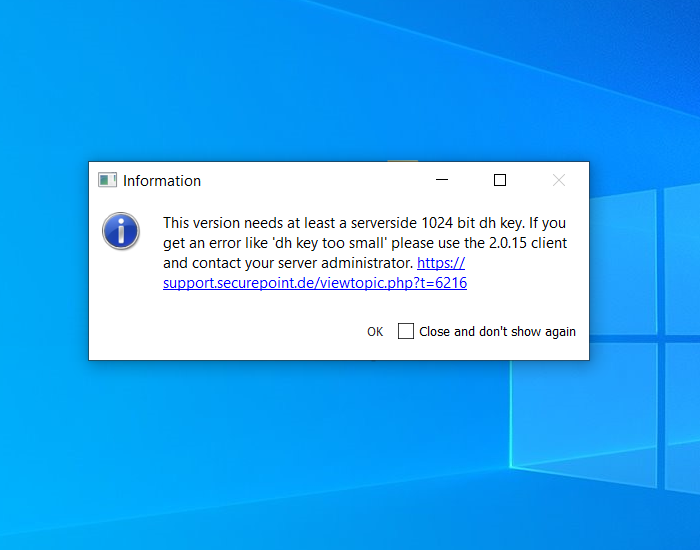
After clicking on the lock, a window will appear where you must click on the white square with the caption “Close and don’t show again”.
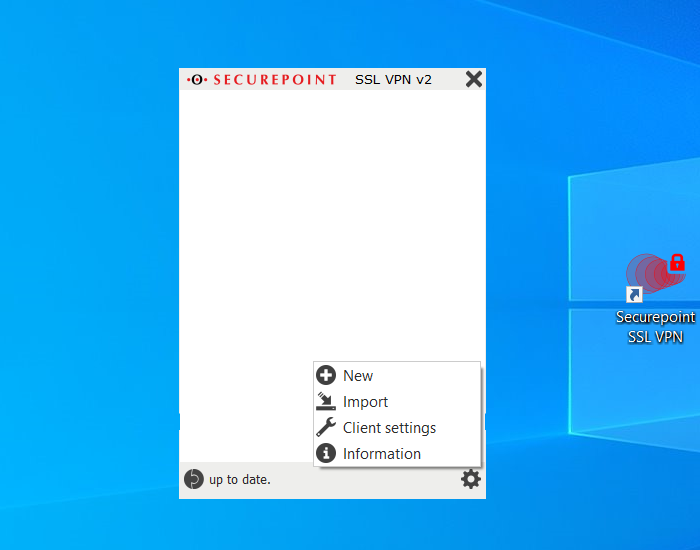
After this interface appears, click on the “settings wheel”. When the settings menu appears click on“Import”.
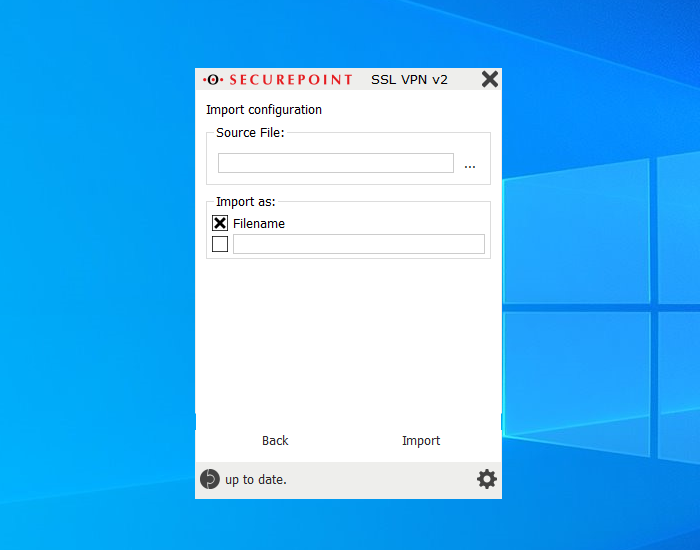
Click on the “…” button and that will open a folder navigation window.
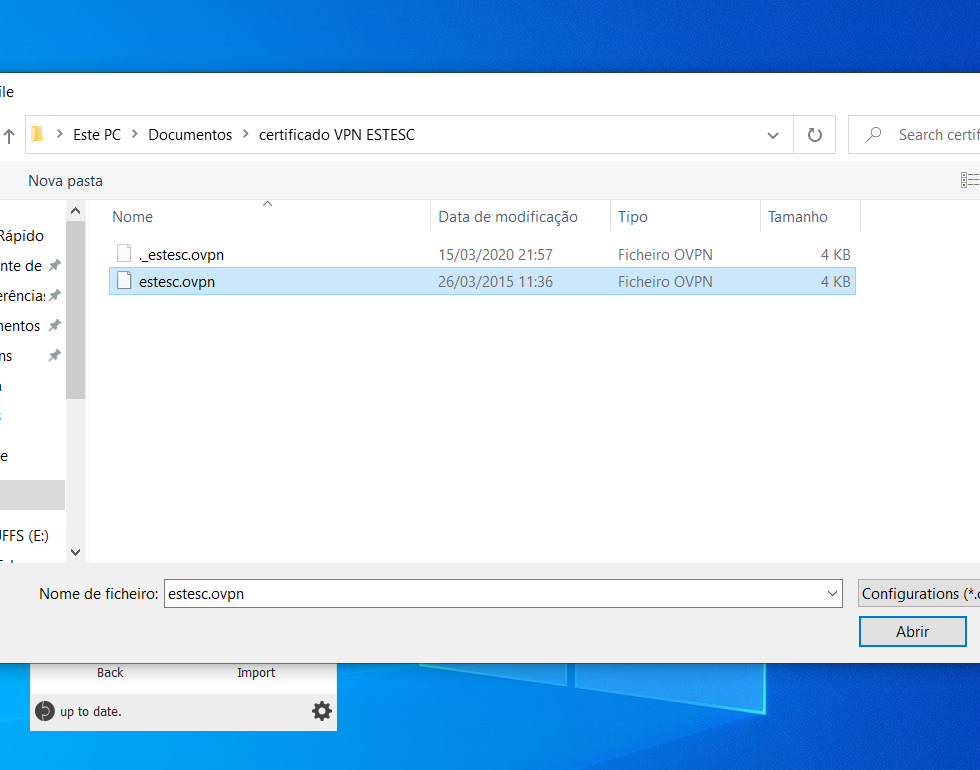
Go to the folder where you previously saved the file “estesc.ovpn” (If you followed all the previous instructions, it should be in “My Documents”).
Open it, choose the file and click on “Open”.
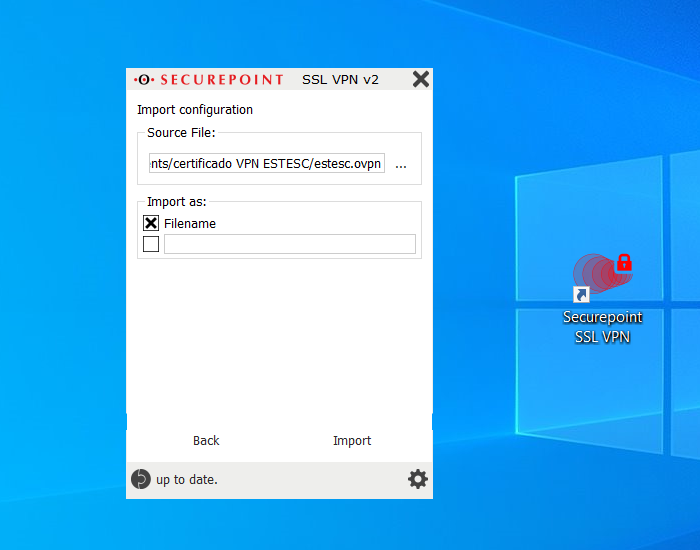
Click “Import”.

After having made the import, you will see the following window where you will click on the two arrows pointing in opposing directions.
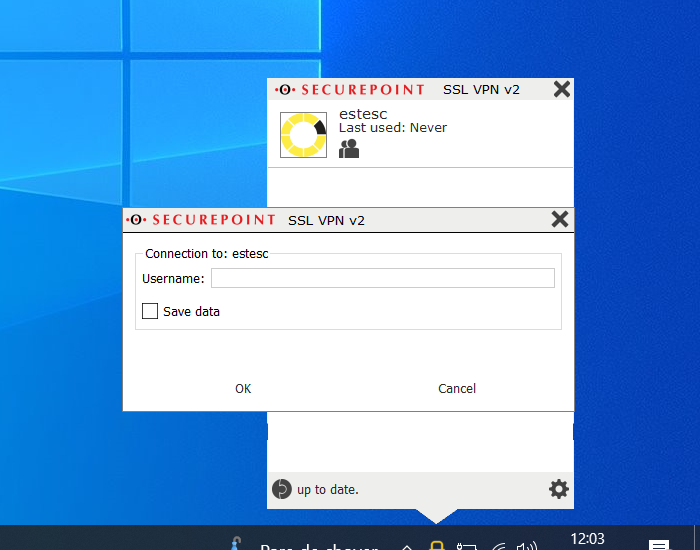
“Username” is your institutional email, the same that you use at https://inforestudante.ipc.pt . Mark the “Save data” box if you want to remember your username and click the “Ok” Button.
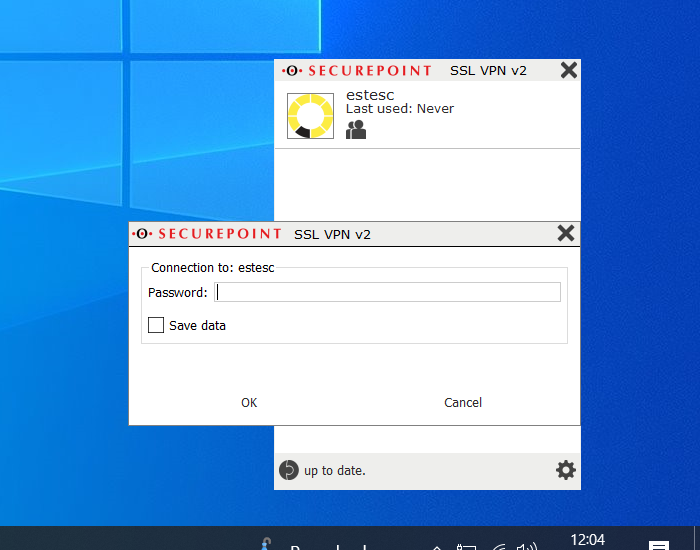
“Password” is also the same password you use at the web platform Inforestudante. Choose the “Save data” option if you don’t want to put your password every time you use the VPN and press the “Ok” Button.
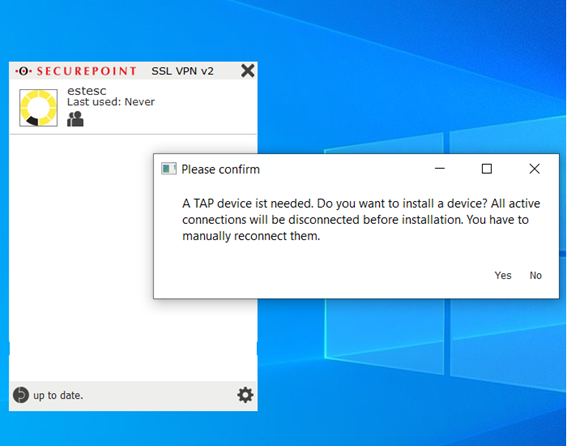
After you insert your password and click “OK”, the following warning will appear. Click “Yes”.

Click “Ok”.
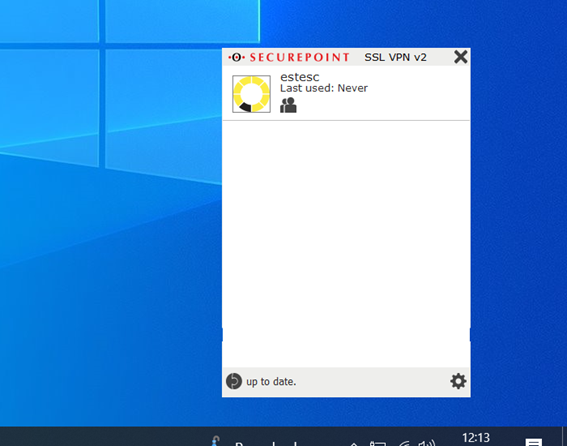
Clicking on the opposing black arrows button, will make the VPN software to attempt an connection, changing into a yellow spinning progress bar as shown above.
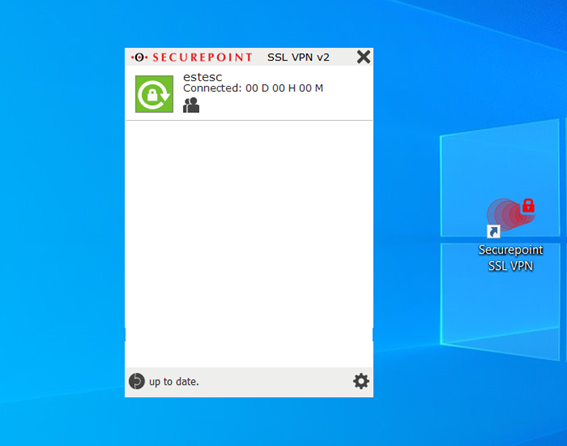
If you followed all the steps correctly and your credentials were not wrongly inserted, the result will be a successful connection, having the green icon as shown above.
Tutorial realized by Filipe Campos and Fernando Godinho